Unfortunately, and unlike the message box, there is no single function we can call to create a window. There are two reasons for this. First, Windows requires too much data for there to be a single function call. Second, windows are based on events, which require additional code to handle. In case you missed it, an event is some action that occurs on a window, such as a button click, window resize, key-press, and so on. When these occur, Windows sends a message to our program, which is handled by WinProc().
This lesson is split into three parts. First, we will look at the code used to make a window, then we will look at each of the two main parts of the program in detail to find out how they work and how to manipulate them if necessary.
Just like the previous lesson, we will be using the function WinMain() to start out our program. We will also use another function called WinProc(). This function will handle any event messages Windows sends to us while the program is running.
Following is a program which contains the code to build and run a window. If you can understand the program from the comments, great. If not, don't worry. I'll explain everything right afterward.
// include the basic windows header file
#include <windows.h>
#include <windowsx.h>
// the WindowProc function prototype
LRESULT CALLBACK WindowProc(HWND hWnd,
UINT message,
WPARAM wParam,
LPARAM lParam);
// the entry point for any Windows program
int WINAPI WinMain(HINSTANCE hInstance,
HINSTANCE hPrevInstance,
LPSTR lpCmdLine,
int nCmdShow)
{
// the handle for the window, filled by a function
HWND hWnd;
// this struct holds information for the window class
WNDCLASSEX wc;
// clear out the window class for use
ZeroMemory(&wc, sizeof(WNDCLASSEX));
// fill in the struct with the needed information
wc.cbSize = sizeof(WNDCLASSEX);
wc.style = CS_HREDRAW | CS_VREDRAW;
wc.lpfnWndProc = WindowProc;
wc.hInstance = hInstance;
wc.hCursor = LoadCursor(NULL, IDC_ARROW);
wc.hbrBackground = (HBRUSH)COLOR_WINDOW;
wc.lpszClassName = L"WindowClass1";
// register the window class
RegisterClassEx(&wc);
// create the window and use the result as the handle
hWnd = CreateWindowEx(NULL,
L"WindowClass1", // name of the window class
L"Our First Windowed Program", // title of the window
WS_OVERLAPPEDWINDOW, // window style
300, // x-position of the window
300, // y-position of the window
500, // width of the window
400, // height of the window
NULL, // we have no parent window, NULL
NULL, // we aren't using menus, NULL
hInstance, // application handle
NULL); // used with multiple windows, NULL
// display the window on the screen
ShowWindow(hWnd, nCmdShow);
// enter the main loop:
// this struct holds Windows event messages
MSG msg;
// wait for the next message in the queue, store the result in 'msg'
while(GetMessage(&msg, NULL, 0, 0))
{
// translate keystroke messages into the right format
TranslateMessage(&msg);
// send the message to the WindowProc function
DispatchMessage(&msg);
}
// return this part of the WM_QUIT message to Windows
return msg.wParam;
}
// this is the main message handler for the program
LRESULT CALLBACK WindowProc(HWND hWnd, UINT message, WPARAM wParam, LPARAM lParam)
{
// sort through and find what code to run for the message given
switch(message)
{
// this message is read when the window is closed
case WM_DESTROY:
{
// close the application entirely
PostQuitMessage(0);
return 0;
} break;
}
// Handle any messages the switch statement didn't
return DefWindowProc (hWnd, message, wParam, lParam);
}
Whoa! This is a quite a jump in size here. Let's go ahead and run this program and see what happens before we go into details. The final result looks like this on my computer:
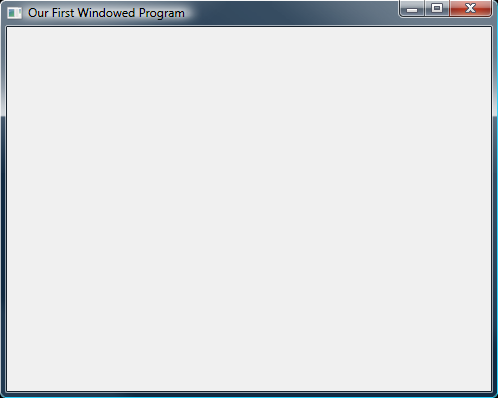
Our First Windowed Program All right, I admit that the program we just wrote is not the easiest to remember straight off. Fortunately, you won't need to. The code you saw stays pretty much the same. You'll be able to clean some of it up a bit when you get to actual game programming, but for now, let's learn what each part of it does.
Of the code in the program above, there are only three steps which are used to create the window, while the rest is there to keep it running. These are the three steps:
1. Register the window class.
2. Create the window.
3. Show the window.
These steps are fairly straightforward, if long and tedious. Without the initialization of variables and parameters, it really just boils down to the following:
RegisterClassEx();
CreateWindowEx();
ShowWindow();
Well, with that all made simple, let's take a quick look at each one of these with all the details included.
Simply put, a window class is a structure fundamental used by Windows to handle properties and actions of the various windows. We will not worry ourselves with the details of this, but know that it is not a C++ 'class' by definition. Basically, a window class is a kind of template for certain properties of the window. Image 3.2 illustrates how this is:
The Window ClassIn this diagram, "window class 1" is used to define the basic properties of "window 1" and "window 2", whereas "window class 2" is used to do the same for "window 3" and "window 4". Each window has its own individual properties, such as window size, position, contents, etc, but the basic properties are still that of the window class.
In this step, we will register a window class. What this means is that we will tell Windows to create a window class based on the data we provide. In order to do this, we have the following code in our program:
// this struct holds information for the window class
WNDCLASSEX wc;
// clear out the window class for use
ZeroMemory(&wc, sizeof(WNDCLASSEX));
// fill in the struct with the needed information
wc.cbSize = sizeof(WNDCLASSEX);
wc.style = CS_HREDRAW | CS_VREDRAW;
wc.lpfnWndProc = WindowProc;
wc.hInstance = hInstance;
wc.hCursor = LoadCursor(NULL, IDC_ARROW);
wc.hbrBackground = (HBRUSH)COLOR_WINDOW;
wc.lpszClassName = L"WindowClass1";
// register the window class
RegisterClassEx(&wc);
Let's go over each of these. I don't want to spend too much time on needless details, so it should go quickly.
This is a struct that contains the information for the window class. We will not cover all of its contents, as some of it will not be needed in game programming. If you want a full rundown of the struct, you can find it in the MSDN Library under WNDCLASSEX. We will call our struct 'wc' for the sake of ease.
ZeroMemory is a function that initializes an entire block of memory to NULL. The address provided in the first parameter sets where the block is to start. The second parameter indicates how long the block is. With the address and size of our struct 'wc', we can quickly initialize the whole thing to NULL. We will use this to initialize the values of 'wc' not covered in this tutorial.
This one is fairly obvious. We need to size up this structure and tell it what it's measurements are. We will do this with the sizeof() operator.
In this member, we store the style of the window. There are plenty of values we can insert, but we will almost never use any of them in game programming. Possible values for this can be found in the MSDN Library under WNDCLASSEX. For now, we will use CS_HREDRAW and logically OR it with CS_VREDRAW. What these two do is tell Windows to redraw the window if it is moved vertically or horizontally. This is useful for a window, but not a game. We will reset this value later when we get into fullscreen games.
This value tells the window class what function to use when it gets a message from Windows. In our program, this function is WindowProc(), but it could be WndProc() or WinProc() or even ASDF() if it suited us. It doesn't matter what the function is called provided we tell the window class in this value.
We covered this one in the last lesson. It is a handle to a copy of our application. Just put the value Windows handed to us in WinMain().
This member stores the default mouse image for the window class. This is done by using the return value from the function LoadCursor(), which has two parameters. The first is the hInstance of the application that stores the pointer graphic. We aren't getting into this, so we'll set it to NULL. The second one is a value that contains the default mouse pointer. There are others in the MSDN Library under LoadCursor().
This member contains the 'brush' that will be used to color the background of our window. Brushes are beyond the scope of this tutorial, but they are used here to indicate the color of the background. COLOR_WINDOW indicates a brush that paints the window white (at least, for my settings).
This is the name of the window class we are building. We are naming it "WindowClass1", even though we will only build one class. It doesn't matter what you name it, so long as you indicate it correctly when making the window itself.
The 'L' that appears before the string, simply tells the compiler that this string should be made of 16-bit Unicode characters, rather than the usual 8-bit ANSI characters.
This function finally registers the window class. We fill its single parameter with the address of the struct we put together and Windows takes care of the rest. Easy, really.
The next step is to create a window. Now that we have our window class made, we can make windows based on that class. We are only going to need one window, so it won't be complex at all. To create the window, we just need the following:
// create the window and use the result as the handle
hWnd = CreateWindowEx(NULL,
L"WindowClass1", // name of the window class
L"Our First Windowed Program", // title of the window
WS_OVERLAPPEDWINDOW, // window style
300, // x-position of the window
300, // y-position of the window
500, // width of the window
400, // height of the window
NULL, // we have no parent window, NULL
NULL, // we aren't using menus, NULL
hInstance, // application handle
NULL); // used with multiple windows, NULL
Fine. So I lied. There is just one function to create a window. This function has a lot of parameters, but they're all very simple. Before we go over them, let's take a glance at the prototype.
HWND CreateWindowEx(DWORD dwExStyle,
LPCTSTR lpClassName,
LPCTSTR lpWindowName,
DWORD dwStyle,
int x,
int y,
int nWidth,
int nHeight,
HWND hWndParent,
HMENU hMenu,
HINSTANCE hInstance,
LPVOID lpParam);
Now let's go over them quickly:
This first parameter was added when RegisterClass() was upgraded to the newer RegisterClassEx(). It is an extention of the fourth parameter, dwStyle, and simply adds more options for the window style. We won't cover any of them here, but they can be seen in the MSDN Library under CreateWindowEx(). We will set this value to NULL to indicate this.
This is the name of the class our window will use. Because we only have one class, we will use what we have, L"WindowClass1". This string also uses 16-bit Unicode characters, thus we put an 'L' in front of it.
This is the name of the window, and it will be displayed in the window's title bar. This also uses Unicode.
This is where we can define all kinds of options for the window. You can do things like take out the minimize and maximize buttons, make it non-resizeable, make it have scroll bars and all kinds of cool things. Again, these can be seen in the MSDN Library under CreateWindowEx().
We will use the single value WS_OVERLAPPEDWINDOW, which is a shortcut to including other values that together build a basic window with standard features.
This one determines the position of the window along the x-axis of the screen.
This one determines the position of the window along the y-axis of the screen.
Here we set the initial width of the window.
Here we set the initial height of the window.
This is a parameter which tells Windows what parent window created the window we are now making. A parent window is a window that contains other windows. We don't have any parent windows in our program, but to give you an example, Microsoft Word, which can open multiple documents in the same window, consists of a parent window with multiple 'child' windows.
Because we aren't doing any of this, we are going to set this parameter to NULL.
This is a handle to a menu bar. We don't have any menu bars either, so this one is NULL as well.
This is the handle to the instance. Set it to hInstance.
This is a parameter we would use if we were creating multiple windows. Because we're not, we'll just keep it simple and leave it as NULL.
The return value of this function is the handle Windows will assign this new window. We will store it directly into our hWnd variable, like this:
hWnd = CreateWindowEx(NULL,
...
And that's all there is to creating a window. Now we have one last, and very simple, step. We have to show the window to the user.
Showing the window is easier than creating a message box. It requires one function with two parameters. The prototype:
BOOL ShowWindow(HWND hWnd,
int nCmdShow);
This is simply the handle to the window we just created, so we place in here the value Windows gave back to us.
Remember that last parameter from WinMain()? Well, this is where we get to use it. Of course, we don't have to, but in this case we'll be nice and let Windows tell us what to do. In your game it really won't matter what Windows tells you to do here, because your window will be fullscreen.
Needed or not, we will put the value we got from nCmdShow here, and leave it at that.
If your program does not run at this point, it's actually because we aren't finished yet. We've created a window, true. But a window requires more than this. And so at this point we move on to the next section of our program, the WinProc() function and the message loop.
Once we have created our window, we need to keep the window going so that it can be interacted with. Of course, if we just end our program off as it is now, it won't so much as compile. But assuming it did, we would still only see a flash as the window was created and destroyed once we reached end of WinMain().
Instead of exiting, our program completes the creation of the window, and launches into what is called the main loop. As we have talked about before, Windows programming is based on events. This means that our window only needs to do something when Windows gives us the go. Otherwise, we just wait.
When Windows does pass us a message, several things immediately occur. The message is placed in an event queue. We use the function GetMessage() to retrieve that message from the queue, we use the function TranslateMessage() to handle certain message formats, and we use the function DispatchMessage() to the WindowProc() function, which then selects what code is to be run as a result of the message.
In case that went over your head, following is a diagram which illustrates the sequence in which this all occurs.
The Process of an Event MessageThe handling of events comprises the other half of our program. It itself is split into two parts:
1. The Main Loop
2. The WindowProc() Function
The main loop only consists of the GetMessage(), TranslateMessage() and DispatchMessage() functions. The WindowProc() function only consists of code to run when certain messages are sent. It is surprisingly simple. Let's dig in and find out about it now.
As seen from the diagram above, this section consists of only three functions. Each function is actually quite simple and we need not get into it in too much detail, but we will cover them in brief.
Following is the code required for the main loop:
// this struct holds Windows event messages
MSG msg;
// wait for the next message in the queue, store the result in 'msg'
while(GetMessage(&msg, NULL, 0, 0))
{
// translate keystroke messages into the right format
TranslateMessage(&msg);
// send the message to the WindowProc function
DispatchMessage(&msg);
}
Without taking loads of time, let's go over each of these lines of code.
MSG is a struct which contains all the data regarding a single event message. You will not usually need to directly access the contents this struct, but in case you do, I'll give you a peek at what it contains:
| Member | Description |
|---|
| HWND hWnd | Contains the handle of the window which recieved the message. |
| UINT message | Contains the identifier of the message sent. |
| WPARAM wParam | Contains additional information about the message. The exact meaning depends on what message was sent. |
| LPARAM lParam | Identical to WPARAM, and simply contains more information. |
| DWORD time | Contains the exact time at which the message was posted in the event queue. |
| POINT pt | Contains the exact mouse position, in screen coordinates, when the message was posted. |
GetMessage() is the function that gets any messages out of the message queue and into our msg struct. It always returns TRUE, except for when the program is about to exit, in which case it returns FALSE. That way, our while() loop is only broken when the program is completely finished anyway.
The GetMessage() function has four parameters to cover, but we will first cover its prototype:
BOOL GetMessage(LPMSG lpMsg,
HWND hWnd,
UINT wMsgFilterMin,
UINT wMsgFilterMax);
This parameter is a pointer to a message struct, like the one we just covered. We will just put the address of our struct in here.
This is the handle to the window the message should come from. However, you may notice that we put NULL in here. In this parameter, NULL means get the next message for any of our windows. We could actually put the value hWnd here and it wouldn't make any difference, but it would if we had multiple windows. I put NULL in this parameter.
These parameters can be used to limit the types of messages to retrieve off the message queue. Example: using WM_KEYFIRST in the wMsgFilterMin and using WM_KEYLAST limit the message type to keyboard messages. WM_KEYFIRST and WM_KEYLAST are synonymous with the integer values of the first and last keyboard messages. Likewise, WM_MOUSEFIRST and WM_MOUSELAST limit the message type to mouse messages.
There is one special case with these parameters. If you fill each value with '0', then GetMessage() assumes that you want to gather any message, no matter its value. You may notice that we did this in our program.
TranslateMessage() is a function that translates certain key-presses into the proper format. We will not go into this in too much detail, as we will mostly use DirectInput for our keystrokes, and this bypasses the Windows message system. Its single parameter is filled with address of our msg struct.
DispatchMessage() basically does what it says. It dispatches the message. It dispatches it to our WindowProc() function, which we will cover next. This function also has a single parameter filled with the address of our msg struct.
Now that we have covered the main loop, let's find out about this alleged WindowProc() function you keep hearing about.
Here is a brief rundown of what happens. GetMessage() gets a message, we translate it, and we dispatch it using the DispatchMessage() function.
The DispatchMessage() function then makes a call to the appropriate WindowProc() function. Fortunately, we only have one WindowProc() function to worry about, so things will stay relatively simple.
When the WindowProc() function is called, four pieces of information from the MSG struct get passed in. To see these, let's have a look at the prototype for WindowProc().
LRESULT CALLBACK WindowProc(HWND hWnd,
UINT message,
WPARAM wParam,
LPARAM lParam);
You've seen these already if you looked at the parameters of the MSG struct earlier, so we won't go over them again here.
What we will go over is the content of this function. As you saw from the code, it is application-defined, meaning we supply its code.
When a message enters WindowProc, we can use the uMsg argument to determine what message it is. Many programmers, and all game programmers I know, use a switch() statement to determine the message. Here is an example of how you might do this (it's how we do it in our program).
// sort through and find what code to run for the message given
switch(message)
{
// this message is read when the window is closed
case WM_DESTROY:
{
// ...
// ...
} break;
}
Here, the switch statement looks for the code to run. Of course, we only provide the WM_DESTROY message, meaning that if any other message is sent, we just ignore it. The WM_DESTROY message is sent when the window is closing. So when the window closes, we can do whatever we need to do to clean up our application. Right now, all that consists of is telling the application that we're all done, and to return a '0', indicating that all is cleaned up. We do this with the following code:
case WM_DESTROY:
{
// close the application entirely
PostQuitMessage(0);
return 0;
} break;
The PostQuitMessage() function sends the message WM_QUIT, which has an integer value of '0'. If you recall back to your main loop, you will remember that the GetMessage() function only returns FALSE when the program is about to quit. Well, to be a little more specific, it returns FALSE when a '0' is sent, as in the case of WM_QUIT. So what this function basically does is tell our program to finish up the WinMain() function properly.
Next we return '0'. This is rather important, because it tells Windows that we handled the message. If we returned something else, Windows could get confused.
If you study the code for our program, you will find that there is one last function to be described, DefWindowProc(). What this function does is handle any messages we did not handle ourselves. In short, it handles messages that we didn't return a '0' for. We therefore place it at the end of the WindowProc() function so that it catches anything we miss.
Well, if you are still reading this, congratulations! You are now a master of Windows programming, and well on your way to game programming.
If this is your first time through this type of program, don't expect to remember it perfectly. I certainly won't demand it, and you can come back and dig through the code as many times as you like until you are completely familiar with it.
With that said, let's get a move on! We have two more short lessons to go before you are officially into DirectX! There is no time to lose!
Next Lesson: The Real-Time Message Loop
GO! GO! GO!
© 2006-2026 DirectXTutorial.com. All Rights Reserved.
Expand