This lesson will cover how to build a basic Windows application. Before we get into actually building a window (which is required for DirectX), we will cover how to create an application and add a simple message box. We will do this by learning each step of a "Hello World!" program.
If this is your first time through this code, note that it is not expected that you remember every line of code we go over here. You may, after some time programming, be able to remember them without reference. But for now, know that if you cannot remember the code in the next four lessons, it does not mean you are stupid. ;)
Following is a code sample of a simple 'Hello World!' demo for a Win32 Console Application.
#include <stdio.h> // include the standard input/output header file
void main(void) // our program starts here
{
printf("Hello World!"); // print "Hello World!" into the console
return; // return void to windows
}
As you most likely are aware, the function main() is used here to start the application and work with Windows. Simply put, main() is where your program starts, and Windows can feed to your program any parameters you decide might be necessary. Of course, there are specific parameters which can be put in here, but we aren't concerned with these and won't be in any of these tutorials.
A Windows program, however, is different in that it has two functions it uses to work with Windows. One of these is exactly like the Win32 Console's main() function. The other one allows Windows programs to be event-driven. Events are occurrences such as the user clicking the mouse, or pressing a key, or a timer reaching zero. When any of these events occur, Windows records the occurence in a message and places the message in a message queue for the program for which the message is intended, in this case, your game. This second function handles these messages and contains code to run when each occurs. We will cover this second function in the next lesson.
To write our first Windows program, we will need to write the first of these functions, WinMain().
The WinMain() function is the equivalent of the main() function in the Win32 Console. It's where the application starts and where you can do some basic intialization. I usually just put the code for creating a window, for the basic loop, and usually some code for a timer. We'll cover each of these in 'The Basics' lessons. Here is the prototype for the WinMain() function:
int WINAPI WinMain(HINSTANCE hInstance,
HINSTANCE hPrevInstance,
LPSTR lpCmdLine,
int nCmdShow);
Ok, so let's take this function apart:
Before we get into the parameters, let's look at something just before them. Between the int and the WinMain is the word WINAPI. WINAPI is a method of passing parameters which comes from the days of Fortran and Pascal. In short, what it does is reverse the order the parameters are passed. They normally pass from right to left, but with WINAPI, they are passed from left to right. The details on why this is are not really important. Windows simply requires it to be this way.
Now let's take a look at each of the parameters in the function:
This first parameter is an abbreviation for a "handle to an instance". A handle is a 32-bit integer which identifies something, like an object. An instance is a copy of an application. Due to multitasking and the ability to run multiple copies of a program, Windows needs a way to keep track of which programs are which. It does this by giving each instance of any application a "handle to an instance", or an integer which identifies each application from the others. When your program starts, Windows picks a number and puts it into this parameter.
Here we have another relic of the past. This second parameter stands for a handle to the previous instance. What this means is, if there are multiple copies of an application open, hPrevInstance will contain the handle of the last instance to be created. Theoretically.
Way back before 32-bit processors came around and before Windows 95, multiple copies of the same application were forced to share the same memory space. This complicated things greatly, and it was of interest to many programmers to keep their applications from running multiple copies of themselves. In order to avoid this, hPrevInstance would give the handle to the previous instance (if any) and return NULL if this was the only one, allowing a programmer to detect any running copies.
However, now that we have 32-bit applications, Windows now provides each application with its own memory space, and hPrevInstance is now obsolete. It only exists for backward compatibility and is equal to NULL in every application, despite the existence of other copies.
There is a method of detecting previous instances of an application, but it is beyond the scope of this tutorial. You can learn this method by looking in the MSDN Library under the WinMain Function.
This parameter is a long pointer to a string that contains the command line calling existence to the application. Example: If you had an application called "MyApp.exe" and ran it from the Run command prompt in the Start Menu, you could run it like this "MyApp.exe" or "MyApp.exe RunA" or "MyApp.exe RunB". In either case, lpCmdLine would store the entirety of whatever was entered, allowing the program to check for special parameters.
This is useful in game programming for running special modes such as Safe Mode, Windowed Mode, Software-Rendering Mode, Cheat-Code Mode or whatever you want.
This parameter indicates how the window is to appear when created. For instance, this could call for the window being minimized, maximized, or normal, or even open a window with it running in the background. You do not need to use these, but they are available if you so desire. Usually you will not use them in game programming, but they can be useful on occasion. Below are some common values that can come from this parameter:
| Value | Description |
|---|
| SW_SHOWNORMAL | Activates and displays a window. If the window is minimized or maximized, the system restores it to its original size and position. An application should specify this flag when displaying the window for the first time. |
| SW_SHOW | Activates the window and displays it in its current size and position. |
| SW_HIDE | Hides the window and activates another window. |
| SW_MAXIMIZE | Maximizes the specified window. |
| SW_MINIMIZE | Minimizes the specified window and activates the next top-level window in the Z order. |
| SW_RESTORE | Activates and displays the window. If the window is minimized or maximized, the system restores it to its original size and position. An application should specify this flag when restoring a minimized window. |
| SW_SHOWMAXIMIZED | Activates the window and displays it as a maximized window. |
| SW_SHOWMINIMIZED | Activates the window and displays it as a minimized window. |
| SW_SHOWMINNOACTIVE | Displays the window as a minimized window. This value is similar to SW_SHOWMINIMIZED, except the window is not activated. |
| SW_SHOWNA | Displays the window in its current size and position. This value is similar to SW_SHOW, except the window is not activated. |
| SW_SHOWNOACTIVATE | Displays a window in its most recent size and position. This value is similar to SW_SHOWNORMAL, except the window is not actived. |
All right! Enough with the theory! Let's get some code going and some programs running.
We'll take a break here and write a basic program. Let's start out with, you guessed it, a 'Hello World!' program. Here is the code for the program we'll make, and afterward, we'll take the new commands apart and see what's up.
#include <windows.h> // include the basic windows header file
// the entry point for any Windows program
int WINAPI WinMain(HINSTANCE hInstance,
HINSTANCE hPrevInstance,
LPSTR lpCmdLine,
int nShowCmd)
{
// create a "Hello World" message box using MessageBox()
MessageBox(NULL,
L"Hello World!",
L"Just another Hello World program!",
MB_ICONEXCLAMATION | MB_OK);
// return 0 to Windows
return 0;
}
If you run this program, you'll get something like this:
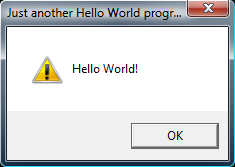
Hello World in ActionLet's take the new parts of this program apart starting from the top and working our way down.
This is a function that creates the message box you saw in the demo. Here is its prototype:
int MessageBox(HWND hWnd,
LPCTSTR lptext,
LPCTSTR lpcaption,
UINT utype);
Now let's quickly go over each of the parameters:
HWND is a handle to a window. As we went over before, handles are integers which identify an object. In this case, we're identifying a window. Simple. Because we have no window made, we put NULL, and Windows knows not to have this message come from any window, but the desktop.
This is a pointer to a 16-bit string that contains the text of the message box. Nothing more to it.
This is a pointer to a 16-bit string that contains the text of the title bar, or caption, for the message box. Simple.
This parameter determines what the style of the message box is. Following is a list of commonly used values you can put into this parameter (combined with a logical OR operator for multiple values).
To indicate the buttons displayed in the message box, specify one of the following values:
| Value | Description |
|---|
| MB_CANCELTRYCONTINUE | The message box contains three push buttons: Cancel, Try Again, Continue. |
| MB_OK | The message box contains one push button: OK. This is the default. |
| MB_OKCANCEL | The message box contains two push buttons: OK and Cancel. |
| MB_RETRYCANCEL | The message box contains two push buttons: Retry and Cancel. |
| MB_YESNO | The message box contains two push buttons: Yes and No. |
| MB_YESNOCANCEL | The message box contains three push buttons: Yes, No, and Cancel. |
To display an icon in the message box, specify one of the following values:
| Value | Description |
|---|
| MB_ICONINFORMATION | An icon consisting of a lowercase letter i in a circle appears in the message box. |
| MB_ICONEXCLAMATION | An exclamation-point icon appears in the message box. |
| MB_ICONERROR | A stop-sign icon appears in the message box. |
In game programming, you normally won't need return values, because error messages (which is what you will use this for 99 percent of the time) only have one direction to go in: quit. However, it is still useful to know. Following is a list of return values, letting you know which button was pressed:
| Value | Button Pressed |
|---|
| IDCANCEL | The 'Cancel' button was selected. |
| IDTRYAGAIN | The 'Try Again' button was selected. |
| IDCONTINUE | The 'Continue' button was selected. |
| IDNO | The 'No' button was selected. |
| IDYES | The 'Yes' button was selected. |
| IDOK | The 'OK' button was selected. |
Great! You are now officially a Windows programmer. Yes, we've only covered how to make the simplest of programs, but we'll fix that shortly by writing a program to create a window. Let's get to it!
Next Lesson: Creating a Window
GO! GO! GO!
© 2006-2026 DirectXTutorial.com. All Rights Reserved.
Expand