Some versions of Visual Studio will automatically locate the header files and library files for DirectX when you include them into your code. However, some versions will not, and you will need to set your project up accordingly.
In this scenario, you'll get an error message when you compile, which reads:
fatal error C1083: Cannot open include file: 'd3dx11.h': No such file or directory
If you don't get this error, excellent! Otherwise, continue reading.
To fix this error, we must set our Visual Studio Project file to include a path to the appropriate folders containing the DirectX SDK.
Start by opening the project's properties. It can be found in the Project menu under: [ProjectName] Properties.
In the left panel, under Configuration Properties, select VC++ Directories.
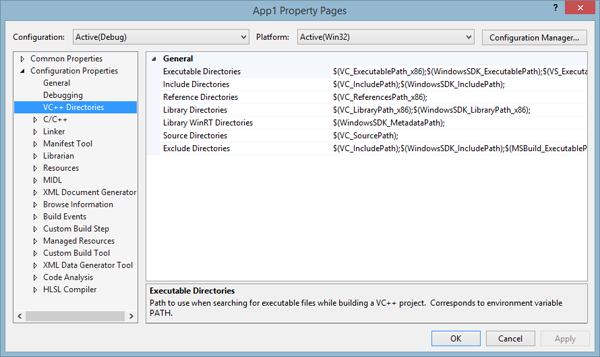
VC++ Directories (Visual Studio 2013)In the right panel, you will now see a list of directory fields. We are interested in the Include Directories field and the Library Directories field.
We need to add a folder path to each of these fields. They will be to folders inside the DirectX SDK folder, commonly located at C:\Program Files (x86)\Microsoft DirectX SDK (June 2010).
In Include Directories, we want to add:
C:\Program Files (x86)\Microsoft DirectX SDK (June 2010)\Include
In Library Directories, we want to add:
C:\Program Files (x86)\Microsoft DirectX SDK (June 2010)\Lib\x86
You can also use the x64 folder instead of x86 if you are working with a 64-bit build.
Press Okay, and rebuild your project. Everything should work!
Unless of course you did something else wrong :/
