Once Direct3D is initialized and the swap chain is set up, it's time to start doing some actual rendering. Rendering itself is very easy, but there is a little bit of preparatory work involved. In this lesson we're going to get everything set up to render a blank frame with a specific color, over and over again.
The setup involved is simple. There are two things that need to be done. First, we need to tell the GPU where in memory to create the final image (for us, this is the back buffer). Second, we need to tell the GPU where on the backbuffer it should draw.
Once that's done, we can render, and man is it easy.
Let's start with where to render to. Now logically you would say, "the backbuffer, duh!" and be done. However, Direct3D doesn't actually know that at this point. It is possible that you do not want to render to the back buffer right away. For example many games render to the surface of a model, then render that model to the back buffer. This technique can produce a variety of effects. If you have played the game Portal you will have seen an example of this. In Portal, the game engine first renders to the portal, then renders a full scene with the portal image included.
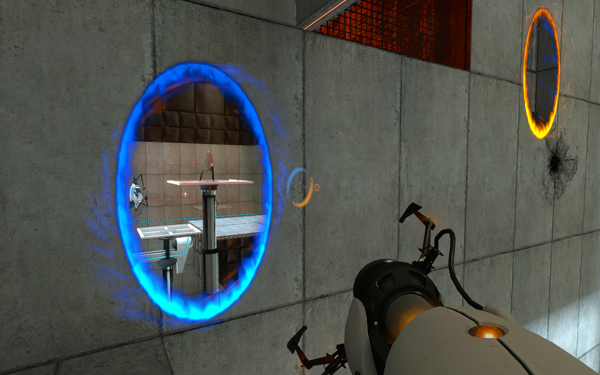
Rendering to a Portal, and Rendering to the Back BufferWhen rendering in Direct3D, you must establish the render target. This is a simple COM object that maintains a location in video memory for you to render into. In most cases (including our case) this is the back buffer.
Here's how we do it:
ComPtr<ID3D11RenderTargetView> rendertarget; // added to the CGame class
// this function initializes and prepares Direct3D for use
void CGame::Initialize()
{
// Direct3D initialization
// ...
// create the swap chain
// ...
// get a pointer directly to the back buffer
ComPtr<ID3D11Texture2D> backbuffer;
swapchain->GetBuffer(0, __uuidof(ID3D11Texture2D), &backbuffer);
// create a render target pointing to the back buffer
dev->CreateRenderTargetView(backbuffer.Get(), nullptr, &rendertarget);
}
Whoa. It looks complex, but it's pretty simple.
There are two things being done here. First, we determine the address of the back buffer. Second, we create a render target object that uses the back buffer as the target.
There's some new code here, so let's find out what it all means.
This is a COM interface that holds all the information about the render target and lets us manipulate it.
In 3D rendering, a texture is another name for an image. An ID3D11Texture2D is an object that stores a flat image. Like any COM object, we first define the pointer, and later a function creates the object for us.
GetBuffer() is a function finds the back buffer on the swap chain and creates an interface directly pointing to it.
The first parameter is the number of the back buffer we want to obtain. We are only using one back buffer on this swap chain, and it is back buffer #0. Therefore the first parameter will be 0.
The second parameter is not that new to us. __uuidof() tells GetBuffer() what type of COM interface we want to obtain.
The third parameter is the address of our interface ComPtr. GetBuffer() will store our interface here.
This function creates the render target object. We defined the ComPtr for this object in our CGame class.
The first parameter is a pointer to the texture. We called this 'backbuffer'. We need the actual pointer to the interface, so we use backbuffer.Get().
The second parameter is a struct that describes the render target. We won't need to fill this out, and using nullptr will set everything to defaults.
The third parameter is the address of the render target interface. We called this 'rendertarget', and we'll just put &rendertarget here.
Once we've created the render target, it has to be set as the active render target. This must be done each frame.
Setting the render target is simpler than creating it. It takes a single command.
// this function renders a single frame of 3D graphics
void CGame::Render()
{
// set our new render target object as the active render target
devcon->OMSetRenderTargets(1, rendertarget.GetAddressOf(), nullptr);
// switch the back buffer and the front buffer
swapchain->Present(1, 0);
}
This function sets our previously created render target as the active render target. More precicely, it sets multiple render targets, though we only have one render target for now.
The first parameter is the number of render targets to set. This will usually be 1, but there are cases where it will be more.
The second parameter is a pointer to a list of render target view objects. Again, we only have one, so it's just the address of our render target interface. We get this using the GetAddressOf() function.
GetAddressOf() is a bit different from Get(). It gets a pointer to a pointer, instead of just a pointer.
The third parameter is advanced, and we'll get into it in a later lesson. For now it can be nullptr.
Next we'll create a function that renders a single frame by setting the entire back buffer to a single color. Of course, you can change the color if you want. Here is the code for this function.
// this function renders a single frame of 3D graphics
void CGame::Render()
{
// set our new render target object as the active render target
devcon->OMSetRenderTargets(1, rendertarget.GetAddressOf(), nullptr);
// clear the back buffer to a deep blue
float color[4] = {0.0f, 0.2f, 0.4f, 1.0f};
devcon->ClearRenderTargetView(rendertarget.Get(), color);
// do 3D rendering on the back buffer here
// switch the back buffer and the front buffer
swapchain->Present(1, 0);
}
The ClearRenderTargetView() function sets each pixel in a render target to a specific color.
The first parameter is the address of the render target interface. Easy enough.
The second parameter is an array of four float values. The first is red, the second is green, the third is blue, and the fourth is "transparency", though transparency doesn't do anything in this function.
Each value in the float array is a value between 0.0f and 1.0f. 1.0f means full color and 0.0f means no color. By combining float values, we can create any color we want.
Excellent! We've got Direct3D running and we've got a simple, blank frame rendering into a window. We're making good progress.
Below, I've added in the new code. Take a look over it, and go ahead and run the new program.
[
Game.cpp] [
Game.h] [
App.cpp]
#include "pch.h"
#include "Game.h"
// this function initializes and prepares Direct3D for use
void CGame::Initialize()
{
// Define temporary pointers to a device and a device context
ComPtr<ID3D11Device> dev11;
ComPtr<ID3D11DeviceContext> devcon11;
// Create the device and device context objects
D3D11CreateDevice(
nullptr,
D3D_DRIVER_TYPE_HARDWARE,
nullptr,
0,
nullptr,
0,
D3D11_SDK_VERSION,
&dev11,
nullptr,
&devcon11);
// Convert the pointers from the DirectX 11 versions to the DirectX 11.1 versions
dev11.As(&dev);
devcon11.As(&devcon);
// obtain the DXGI factory
ComPtr<IDXGIDevice1> dxgiDevice;
dev.As(&dxgiDevice);
ComPtr<IDXGIAdapter> dxgiAdapter;
dxgiDevice->GetAdapter(&dxgiAdapter);
ComPtr<IDXGIFactory2> dxgiFactory;
dxgiAdapter->GetParent(__uuidof(IDXGIFactory2), &dxgiFactory);
// set up the swap chain description
DXGI_SWAP_CHAIN_DESC1 scd = {0};
scd.BufferUsage = DXGI_USAGE_RENDER_TARGET_OUTPUT; // how the swap chain should be used
scd.BufferCount = 2; // a front buffer and a back buffer
scd.Format = DXGI_FORMAT_B8G8R8A8_UNORM; // the most common swap chain format
scd.SwapEffect = DXGI_SWAP_EFFECT_FLIP_SEQUENTIAL; // the recommended flip mode
scd.SampleDesc.Count = 1; // disable anti-aliasing
CoreWindow^ Window = CoreWindow::GetForCurrentThread(); // get the window pointer
// create the swap chain
dxgiFactory->CreateSwapChainForCoreWindow(
dev.Get(), // address of the device
reinterpret_cast<IUnknown*>(Window), // address of the window
&scd, // address of the swap chain description
nullptr, // advanced
&swapchain); // address of the new swap chain pointer
// get a pointer directly to the back buffer
ComPtr<ID3D11Texture2D> backbuffer;
swapchain->GetBuffer(0, __uuidof(ID3D11Texture2D), &backbuffer);
// create a render target pointing to the back buffer
dev->CreateRenderTargetView(backbuffer.Get(), nullptr, &rendertarget);
}
// this function performs updates to the state of the game
void CGame::Update()
{
}
// this function renders a single frame of 3D graphics
void CGame::Render()
{
// set our new render target object as the active render target
devcon->OMSetRenderTargets(1, rendertarget.GetAddressOf(), nullptr);
// clear the back buffer to a deep blue
float color[4] = {0.0f, 0.2f, 0.4f, 1.0f};
devcon->ClearRenderTargetView(rendertarget.Get(), color);
// perform 3D rendering on the back buffer here
// switch the back buffer and the front buffer
swapchain->Present(1, 0);
}
#pragma once
using namespace Microsoft::WRL;
using namespace Windows::UI::Core;
using namespace Platform;
using namespace DirectX;
class CGame
{
public:
ComPtr<ID3D11Device1> dev; // the device interface
ComPtr<ID3D11DeviceContext1> devcon; // the device context interface
ComPtr<IDXGISwapChain1> swapchain; // the swap chain interface
ComPtr<ID3D11RenderTargetView> rendertarget; // the render target interface
void Initialize();
void Update();
void Render();
};
// Include the precompiled headers
#include "pch.h"
#include "Game.h"
// Use some common namespaces to simplify the code
using namespace Windows::ApplicationModel;
using namespace Windows::ApplicationModel::Core;
using namespace Windows::ApplicationModel::Activation;
using namespace Windows::UI::Core;
using namespace Windows::UI::Popups;
using namespace Windows::System;
using namespace Windows::Foundation;
using namespace Windows::Graphics::Display;
using namespace Platform;
// the class definition for the core "framework" of our app
ref class App sealed : public IFrameworkView
{
bool WindowClosed;
CGame Game; // a class to store our game code
public:
virtual void Initialize(CoreApplicationView^ AppView)
{
AppView->Activated += ref new TypedEventHandler
<CoreApplicationView^, IActivatedEventArgs^>(this, &App::OnActivated);
CoreApplication::Suspending +=
ref new EventHandler<SuspendingEventArgs^>(this, &App::Suspending);
CoreApplication::Resuming +=
ref new EventHandler<Object^>(this, &App::Resuming);
WindowClosed = false; // initialize to false
}
virtual void SetWindow(CoreWindow^ Window)
{
Window->Closed += ref new TypedEventHandler
<CoreWindow^, CoreWindowEventArgs^>(this, &App::Closed);
}
virtual void Load(String^ EntryPoint) {}
virtual void Run()
{
Game.Initialize();
CoreWindow^ Window = CoreWindow::GetForCurrentThread();
// repeat until window closes
while(!WindowClosed)
{
Window->Dispatcher->ProcessEvents(CoreProcessEventsOption::ProcessAllIfPresent);
Game.Update();
Game.Render();
}
}
virtual void Uninitialize() {}
void OnActivated(CoreApplicationView^ CoreAppView, IActivatedEventArgs^ Args)
{
CoreWindow^ Window = CoreWindow::GetForCurrentThread();
Window->Activate();
}
void Closed(CoreWindow^ sender, CoreWindowEventArgs^ args)
{
WindowClosed = true; // time to end the endless loop
}
void Suspending(Object^ Sender, SuspendingEventArgs^ Args) {}
void Resuming(Object^ Sender, Object^ Args) {}
};
// the class definition that creates our core framework
ref class AppSource sealed : IFrameworkViewSource
{
public:
virtual IFrameworkView^ CreateView()
{
return ref new App(); // create the framework view and return it
}
};
[MTAThread] // define main() as a multi-threaded-apartment function
// the starting point of all programs
int main(Array<String^>^ args)
{
CoreApplication::Run(ref new AppSource()); // run the framework view source
return 0;
}
[Download Solution]
Now that we've got a frame rendering, we should get a blue window!

Our Direct3D Program, Now in Color Once again, let's look at what we've learned and find out if we're ready to move on.
1. What is a render target? What function creates the render target?
2. Why is it important to be able to specify the render target?
1. See if you can get your program to change colors while running. Make it fade from blue to black.
2. Find out what happens if you set the render target during initialization, but not in the Run() function.
Next Lesson: Drawing a Triangle
GO! GO! GO!
© 2006-2026 DirectXTutorial.com. All Rights Reserved.
Expand